Amish made hardwood

It is currently Tue Mar 19, 2024 6:16 am

All times are UTC - 5 hours


Post new topic Reply to topic  [ 14 posts ] 
Author Message
 Post subject: DIY Before and After
PostPosted: Sat Jan 06, 2007 1:23 pm 
Offline
Semi Newbie Contributor

Joined: Wed Mar 22, 2006 6:31 pm
Posts: 78
It's not "done-done", but it's done enough for me to step back and enjoy the changes.

Image Image

Image Image

Image Image

Image Image

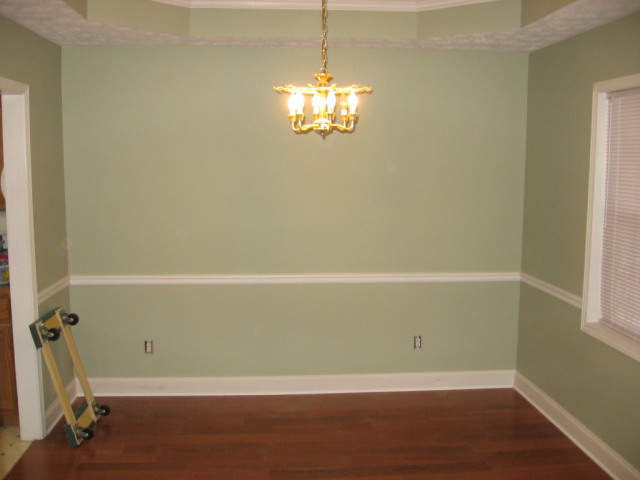
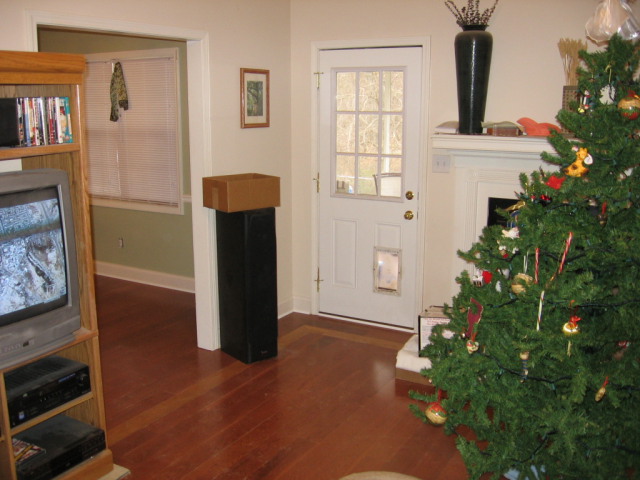
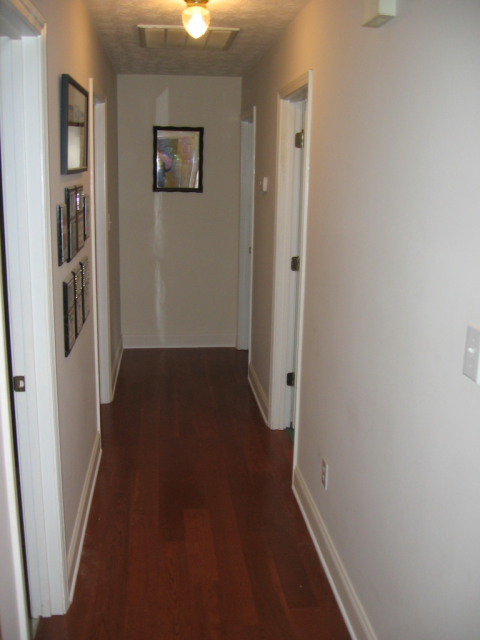
New floors and baseboards are in. 5" x 1/2" engineered. Installed with a Bostitch M111 FS I purchased from Amazon.com for the job after figuring out that used ones cost 90% of new ones, and knowing from the outset that it was going to take longer than I wanted to pay rental on. Used a Porter Cable 18GA Stapler where the M111 wouldn't fit, and a Porter Cable brad nailer for face nailing where required, but I already owned those. The job was about 650 Sq. Ft. all together. It took a LONG time due to many things - First, it was just a low priority. It got worked on when other stuff (real work, yard work, hobbies, etc.) weren't in the way. Second, the subfloors required a LOT of prep. They were originally installed with smooth shank nails, and were thus the squeekiest floors I've ever heard despite the house only being about 12 years old. Everywhere there was a nail, it was driven back in, and then a 2" decking screw added next to it. With an average of 3-4 nails / square foot this was a lot of sinking and driving. The good news is that the floors are silent where this was done. The bad news is that the kitchen, baths, and bedrooms still need the same performed.

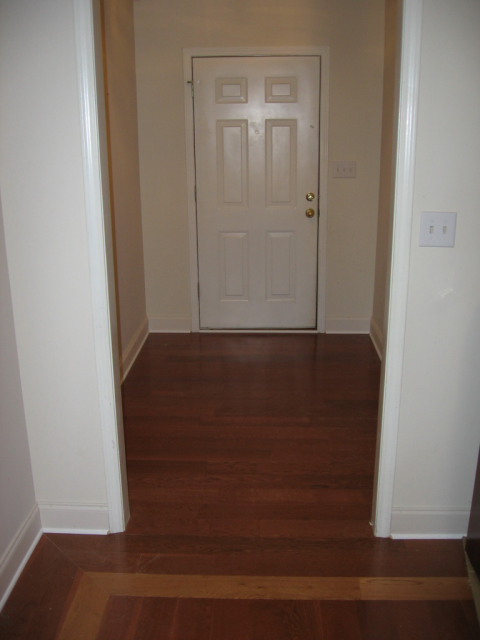
I also screwed up in the foyer - I originally was going to put an added layer of 5/16" underlayment everywhere but the foyer and install the wood right over the existing 5/16" parquet. My wife convinced me that was wasteful and I should just pull the parquet out. Only after I was halfway done did I appreciate what a bad idea that was. It turns out the glue that holds the parquet down is stronger than the glue that holds plywood together. I destroyed the subfloor in the foyer. I ended up having to cut out the part that I could and replace it with new 3/4" ply, and then use bondo to smooth the area around the walls in that could not be replaced. And just for kicks, in the 30 second time gap between pulling out the destroyed subfloor and dropping in the already cut to size piece, the dog tried to walk on the insulation and fell through to the concrete basement floor 10' below. :roll: Fortunately he was OK outside of a bloody lip.

In addition to the floors, the dining room has had the worlds ugliest wallpaper removed and been painted. The rest of the house still needs paint and the bedrooms still need the green carpet replaced with some other carpet, but that is minor compared to what has been done. The whole place also needs a thorough cleaning and some decorating, but again - minor.

By the way - advise for any DIY flooring guys to be. If your wife asks if you can install a border, the correct answer is no. That easily doubled the amount of work. I installed the border as I went, rather than installing the field, then cutting, then insstalling the border. I still don't know whether that was a decent decision, but I am pleased with the results, which is the most important part.

Once I'm for real done I'll post a thread with some "in process" shots and some details that I was kinda proud of.


Top
 Profile  
 
Amish made hardwood

 Post subject:
PostPosted: Sat Jan 06, 2007 3:28 pm 
Offline
Most Valuable Contributor

Joined: Sat Sep 25, 2004 7:42 pm
Posts: 4373
Location: Antioch, CA. 94509
It almost always takes longer than one expects. There are SO many details involved and one almost always runs into issues and problems that cause more work and delays. But what you've done looks very nice. What was your reasoning for using a wide board for the contrasting feature strip in your border? Not a critisism, just trying to understand what different folks like. And since you replaced your baseboards, what was the reasoning for using baseshoe as well?


Top
 Profile  
 
 Post subject:
PostPosted: Sat Jan 06, 2007 4:16 pm 
Offline
Semi Newbie Contributor

Joined: Wed Mar 22, 2006 6:31 pm
Posts: 78
Gary wrote:
It almost always takes longer than one expects. There are SO many details involved and one almost always runs into issues and problems that cause more work and delays. But what you've done looks very nice. What was your reasoning for using a wide board for the contrasting feature strip in your border? Not a critisism, just trying to understand what different folks like. And since you replaced your baseboards, what was the reasoning for using baseshoe as well?


I appreciate the comments. You're one of the gurus here, so hearing that it looks nice to you is a huge complement. Thanks!

Wide Accent Strip - There were a few factors in this. First, I like borders and such, but many of them are more ornate than this house justifies. I wanted it to add character and a custom touch, without seeming out of place. A lot of the borders that I've seen and love in 7-figure homes just wouldn't work in a modest 3/2 ranch. Second is that the accent is the same wood as the rest of the house, just in a lighter finish. It allowed me to get a custom touch out of pre-finished pre-milled boards. Part of what helped make the decision on the border in general was that I wanted the boards to run lengthwise in both the living room and the hallway, which are perpendicular to each other. I didn't want to simply have a transition in the doorway, as that interuption in the flow would bother me, but by putting the boarder in it allowed me to turn the direction 90* but hide it in a decorative element.

The Base Shoe was a matter of needing to cover gaps. I ended up with a 5/8" gap from the wall on the far wall of the living room. The 9/16" baseboard nearly covered it, but not quite. I probably could have gotten away with it and nobody would have noticed, but it would bug me to see it. The frustrating part of that was that it was literally 1 wall that needed the shoe molding, but for consistency sake I went back and installed it everywhere. The good thing about the shoe molding was that I was able to install it with 45* miters rather than coping the corners like the baseboard necessitated, so it wasn't a huge amount more work. On the subject of baseboard, it always amazes me what a difference a moderately higher priced base board can make in the look of a room. I used primed MDF baseboard. The builder grade 3" was like $.50/ft, whereas I paid $.75/ft for the 5.5" tall board. A small increase in price, but a huge difference in the overall look.


Top
 Profile  
 
 Post subject:
PostPosted: Sat Jan 06, 2007 4:30 pm 
Offline
Newbie Contributor

Joined: Mon Oct 16, 2006 1:24 am
Posts: 29
Location: Midland, MI
Looks like you did a great job. Nice to get off your knees isn't it.

Quote:
And since you replaced your baseboards, what was the reasoning for using baseshoe as well?


Gary:
Don't most manufactures suggest 3/4 of an inch gap between wall and the floor? I'm replacing my entire baseboard too and I'm adding shoe for this reason. The baseboard I'm using is about 3/8 on the bottom. Was this a mistake in my case? Btw 3/4 seems excessive so I'm going a little over 1/2 but I still need shoe because of my base. My other house I took the floor a 1/4 away from the wall and used no shoe without any problems. I dunno...I think I could have done it this way with my current house but I have read many times a 1/2 gap minimum.


Top
 Profile  
 
 Post subject:
PostPosted: Sat Jan 06, 2007 4:35 pm 
Offline
Newbie Contributor

Joined: Mon Oct 16, 2006 1:24 am
Posts: 29
Location: Midland, MI
Quote:
The builder grade 3" was like $.50/ft, whereas I paid $.75/ft for the 5.5" tall board. A small increase in price, but a huge difference in the overall look.


I thought about going with a bigger board too but with my style of house (tri-level) it would seem out of place. I am trying to keep all the base the same throughout and much of it is new in other parts of the house.


Top
 Profile  
 
 Post subject:
PostPosted: Sun Jan 07, 2007 5:45 am 
Offline
Prized Contributor

Joined: Tue Aug 17, 2004 1:26 am
Posts: 1195
Location: Virginia
Hi Dave, that looks really nice and its good to get feedback from homeowners like you. You should feel proud.

Base shoe in my opinion depends largely on where you live. In my area people want it and expect it to be installed. If I didn't do it they would want to know why. I prefer the painted look like Dave did, but most of victims want stained to match the flooring, I think that is a mistake.

Base shoe is a money maker for me too. I charge 1.75 a lft for either oak stained or 1 coat painted (pre-primed). Thats probably too cheap but it can add several hundred dollars to a job. I'm already there and more than happy to do it for them :) .


Top
 Profile E-mail  
 
 Post subject:
PostPosted: Tue Jan 09, 2007 4:06 pm 
Offline
Semi Newbie Contributor

Joined: Wed Mar 22, 2006 6:31 pm
Posts: 78
Thanks Jerry. I'm pretty indifferent on whether or not there should be base shoe. I think it looked a little cleaner without it, but looks a little more elegant with it. Just depends on what look you're after. I definitely prefer it painted though. The base shoe in our old parquet floor was stained and it looked odd to me. While I realize that it's a transition piece, it seems to me that it is a piece of molding and should match the rest of the molding, not the floor.


Top
 Profile  
 
 Post subject:
PostPosted: Tue Jan 09, 2007 10:14 pm 
Offline
New User

Joined: Tue Jan 09, 2007 10:01 pm
Posts: 7
Location: California
I like the shoe, to match the baseboards. Baseboard doesn't always rest as flat as we'd like, shoe takes care of that.


Top
 Profile  
 
 Post subject:
PostPosted: Tue Jan 09, 2007 11:08 pm 
Offline
Semi Newbie Contributor

Joined: Wed Mar 22, 2006 6:31 pm
Posts: 78
Steve-O wrote:
Baseboard doesn't always rest as flat as we'd like, shoe takes care of that.


While that wasn't my purpose in installing it, that was the case for me as well. I had places where, even fitting the baseboard as close as I could, I still had gaps as big as 1/16" just due to the floor not being completely flat. The shoe easily follows the floor.


Top
 Profile  
 
 Post subject:
PostPosted: Wed Jan 10, 2007 4:37 pm 
Offline
Most Valuable Contributor

Joined: Sat Sep 25, 2004 7:42 pm
Posts: 4373
Location: Antioch, CA. 94509
I try explaining that to contractors and homeowners all the time, that baseshoe LOOKS right, especially when painted to match the baseboards. And it takes care of those gaps underneath tall baseboards that can sometime occur. The only thing I don't like is painting it! But some contractors and homeowners are adament, NO BASESHOE. So they have to pay extra to have the tall base scribed to the floors.


Top
 Profile  
 
 Post subject:
PostPosted: Tue Jun 26, 2007 6:57 pm 
Offline
New User

Joined: Tue Jun 26, 2007 6:15 pm
Posts: 3
Quote:
I originally was going to put an added layer of 5/16" underlayment everywhere but the foyer and install the wood right over the existing 5/16" parquet.


I have parquet floor in the room where I'm about to install new 5/16" solid. Would you recommend that I simply install over the existing floor? If so, how should I prep it, and should I place anything in between the floors? Then should I staple/nail or glue? Thanks. By the way, your pictures are beautiful. I hope mine turns out as well.


Top
 Profile  
 
 Post subject:
PostPosted: Wed Jun 27, 2007 3:17 am 
Offline
Most Valuable Contributor

Joined: Sat Sep 25, 2004 7:42 pm
Posts: 4373
Location: Antioch, CA. 94509
Deb,

Try posting your question as a new subject under the general forum. It may get lost stuck back here.

Gary


Top
 Profile  
 
 Post subject:
PostPosted: Wed Nov 14, 2007 11:10 pm 
Offline
Worthy Contributor

Joined: Tue May 22, 2007 10:17 am
Posts: 160
Good to know about the base shoe, because I'm definitely going to need it!


Top
 Profile  
 
 Post subject: Re: DIY Before and After
PostPosted: Thu Jul 21, 2011 7:29 am 
Offline
Newbie Contributor

Joined: Thu Jul 21, 2011 6:58 am
Posts: 13
Well, baseboard is also good for perfecting carpentry skills.


Top
 Profile E-mail  
 
Post new topic Reply to topic  [ 14 posts ] 

All times are UTC - 5 hours


Who is online

Users browsing this forum: No registered users and 0 guests


You cannot post new topics in this forum
You cannot reply to topics in this forum
You cannot edit your posts in this forum
You cannot delete your posts in this forum

Search for:
Jump to:  
Powered by phpBB © 2000, 2002, 2005, 2007 phpBB Group

phpBB SEO